

You can design your kitchen in 3D yourself, for free, before you talk to anyone. Our 3D kitchen designer asks six short questions about your room, lays out real Modello Cabinetry boxes in the right sizes, and shows you the result in 3D with 2D plans and a cabinet price range. This tutorial walks through every screen with screenshots, so you know what to measure and what each choice does.
It takes about five minutes. You need a tape measure, and a phone if you want to add photos of the room.
Before you start: what to measure
The designer works in feet and inches. Measure these before you open it:
- Each wall that will get cabinets, corner to corner, along the floor.
- Ceiling height, floor to ceiling. Most Toronto houses are 8 ft; many condos and newer homes are 9 ft.
- Windows and doors on those walls: the distance from the left corner to the edge of the frame, and the width of the frame.
- Where the plumbing and the range outlet are now. Keeping the sink and cooktop roughly where they are keeps the plumbing and electrical simpler.
Don't worry about being exact. Everything can be changed later, and we measure the room precisely at the design visit before anything is ordered.
Step 1: Open the design studio and pick Kitchen
Press Design in 3D with AI anywhere on the site, or open the 3D design studio. Choose Kitchen. The same studio also designs bathroom vanities and closets, and you can switch between them with the tabs at the top of the panel.
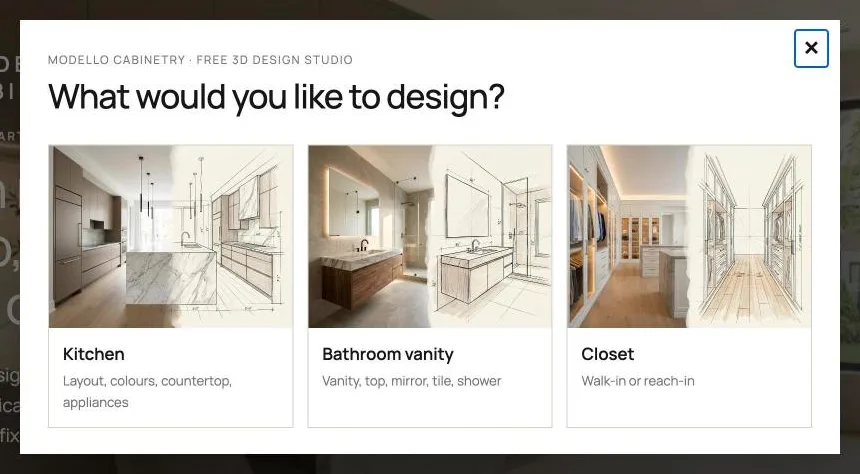
The first time, it asks for your name and email so your design is saved and you can come back to it. After that, the questions start right away.
Step 2: Add photos of your kitchen (optional)
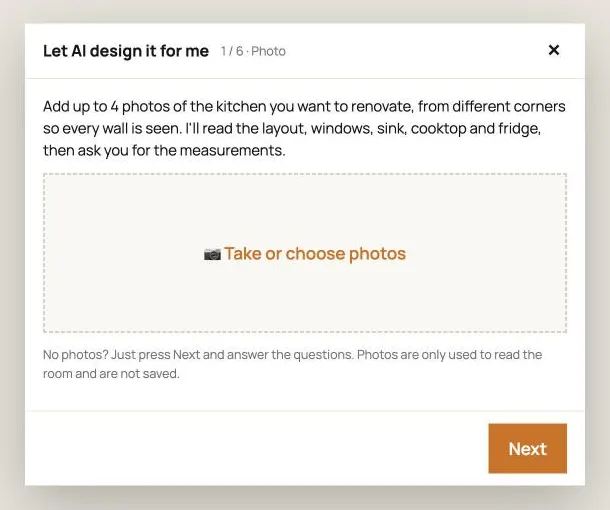
You can add up to four photos of the kitchen you want to renovate, taken from different corners so every wall is seen. The AI reads the layout, the windows, and where the sink, cooktop and fridge are, then pre-fills the next questions. Photos are only used to read the room and are not saved.
Step 3: Choose the layout and enter the measurements
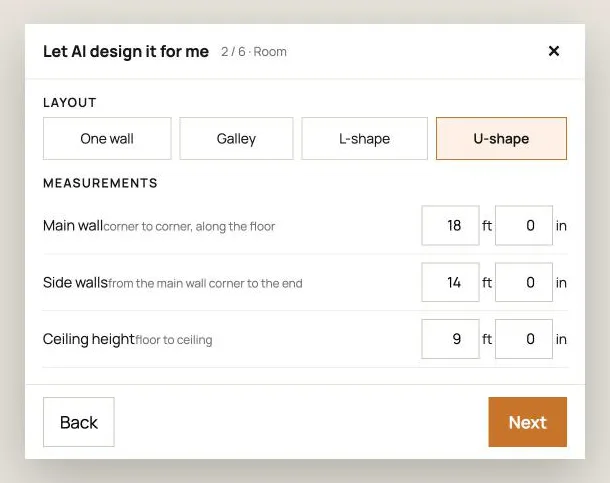
Pick the layout that matches your room: One wall, Galley, L-shape or U-shape. Then enter the main wall, the side wall and the ceiling height. The main wall is the longest wall with cabinets; the side wall is measured from the corner of the main wall to the end of the run.
Step 4: Add windows and doors
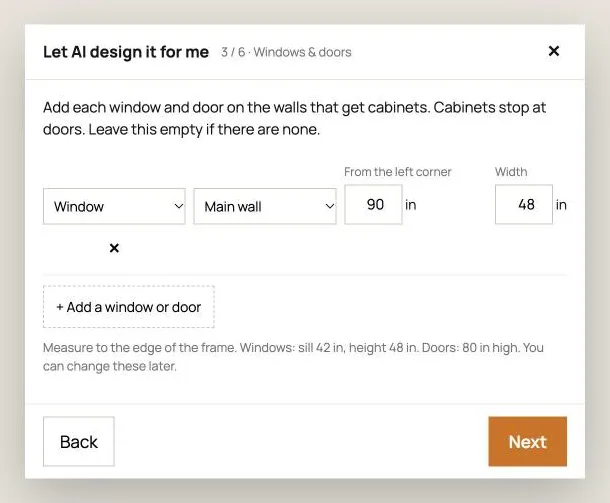
Add each window and door on the walls that get cabinets. Choose which wall it is on, how far it is from the left corner, and how wide it is. Cabinets stop at doors, and the designer keeps upper cabinets clear of windows. If a wall has none, leave this empty.
Step 5: Cabinets, fridge, tall pantries and island
This screen sets the parts that change the look the most:
- Upper cabinet height: 30, 32, 36 or 40 in. Taller uppers give more storage and look more built-in on a 9 ft ceiling.
- Fridge position: left or right end of the main wall, on the side wall, or no fridge in this run.
- Tall cabinets: pantry units on either wall, and open shelf units.
- Pot lights in the ceiling.
- Island or no island.
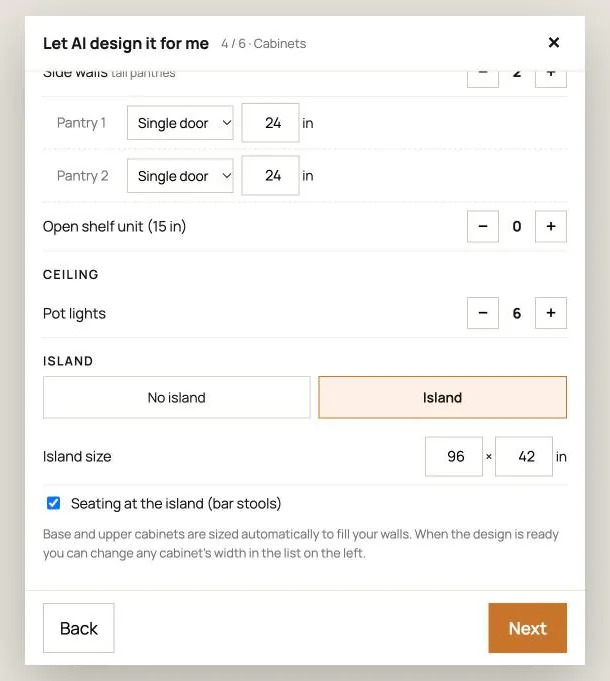
Tall pantries are placed at the ends of a run, not in the middle of the counter, so you keep one continuous work surface.
Step 6: Sink, cooking and microwave
Choose where the sink and the cooktop go (main wall, side wall or island), the cooking setup (cooktop with an oven below, a range, a wall oven, a microwave/oven combo or a double wall oven), the cooktop size and where the microwave goes.
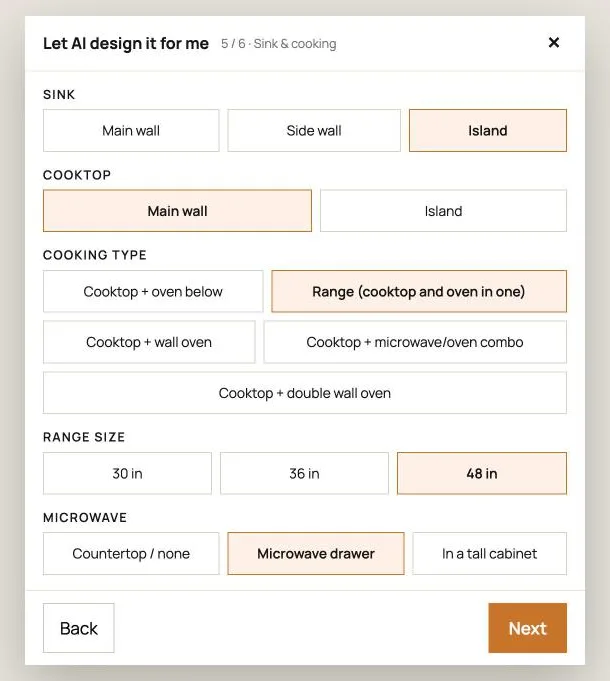
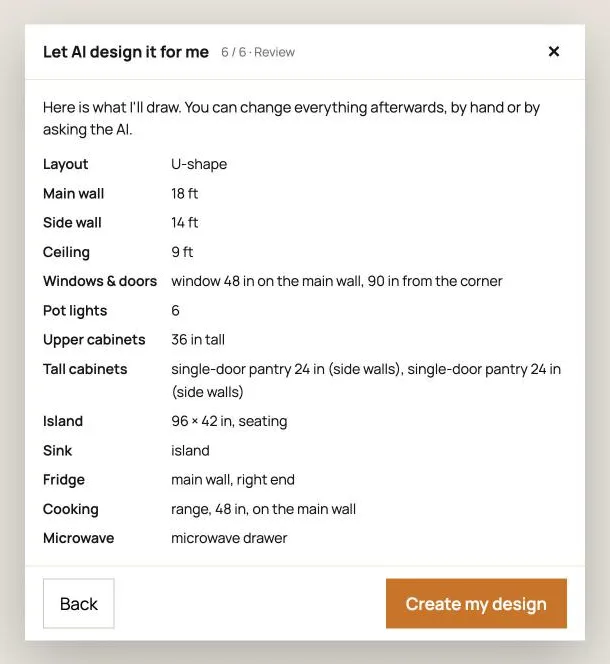
Step 7: Review and create your design
The last screen lists everything you chose. Check the sizes, then press Create my design.
Step 8: See your kitchen in 3D and the price range
A few seconds later your kitchen appears in 3D, built from Modello Cabinetry boxes in standard sizes. Drag to turn it, use the zoom buttons, or press Walk-through to look around the room at eye level. Views jumps to preset angles and Full screen hides the panel.
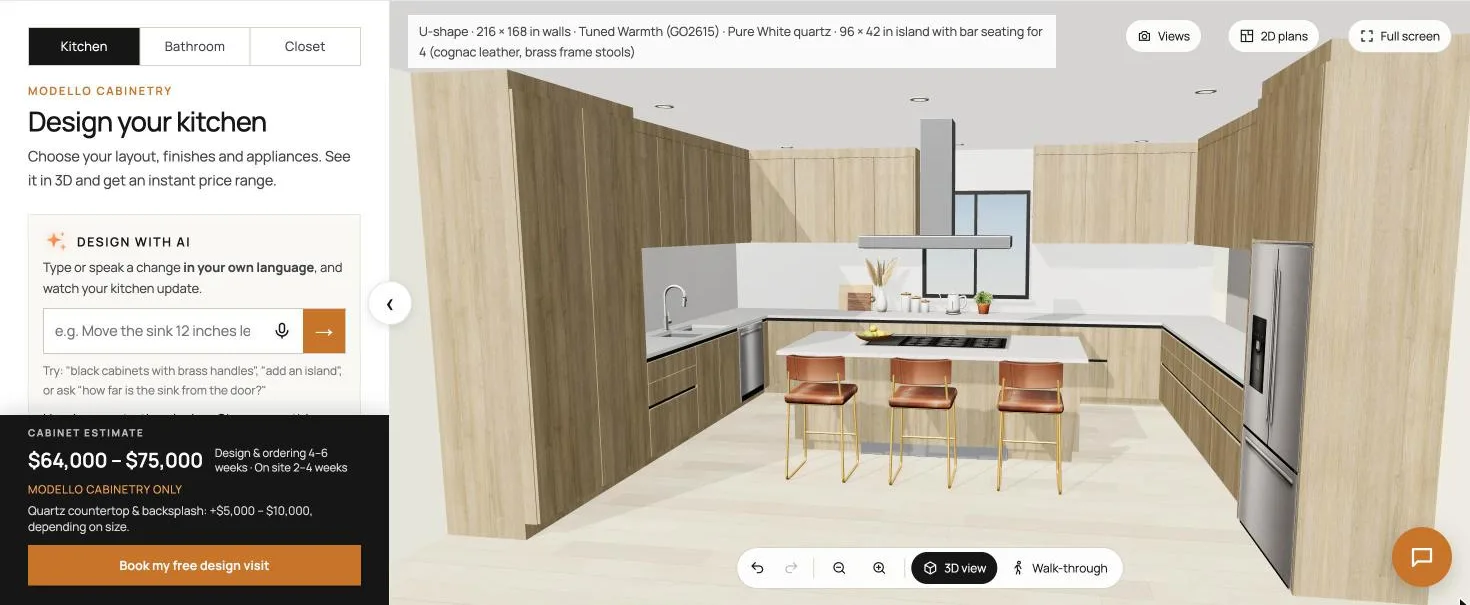
The cabinet estimate at the bottom left is a price range for the Modello cabinetry in your design, with the timeline for design, ordering and installation. The quartz countertop and backsplash are shown as a separate range, because they depend on the stone and the size.
Step 9: Change anything by asking the AI
You don't have to find the right menu. Type the change in the Design with AI box, in your own words and in your own language, or press the microphone and say it. For example:
- "black cabinets with brass handles"
- "move the sink 12 inches to the left"
- "add a pantry next to the fridge"
- "how far is the sink from the door?"
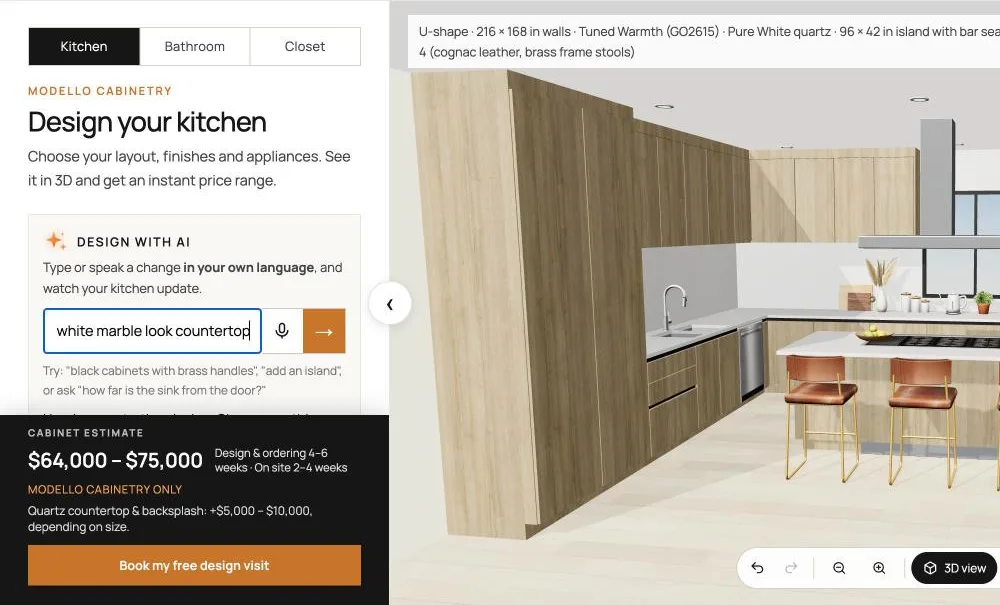
The model updates in a few seconds, with real Modello colours and handles:
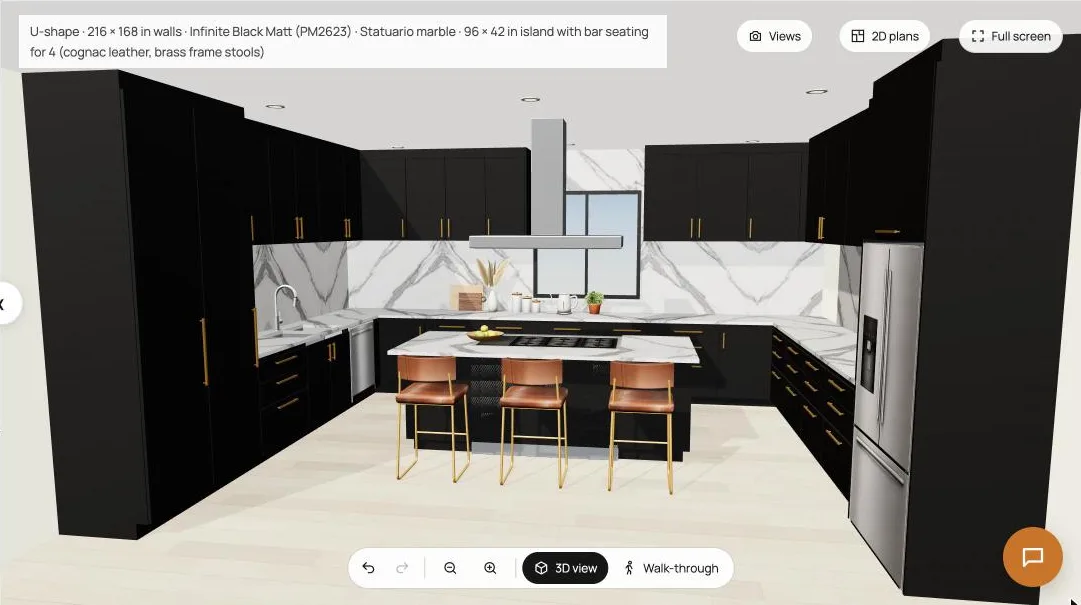
If you'd rather click, open the panel on the left. It has three sections: Room (layout, size, windows and doors), Cabinets (sizes, pantries, colours and handles) and Countertop & appliances (stone, sink, cooking and hood). Undo and redo are in the toolbar under the 3D view.
Step 10: Download the 2D plans
Press 2D plans to see the drawings made from your design: a floor plan, an elevation of each wall, the island, a cabinet schedule and a finish schedule. Download PDF saves all of them in one file you can print or share.
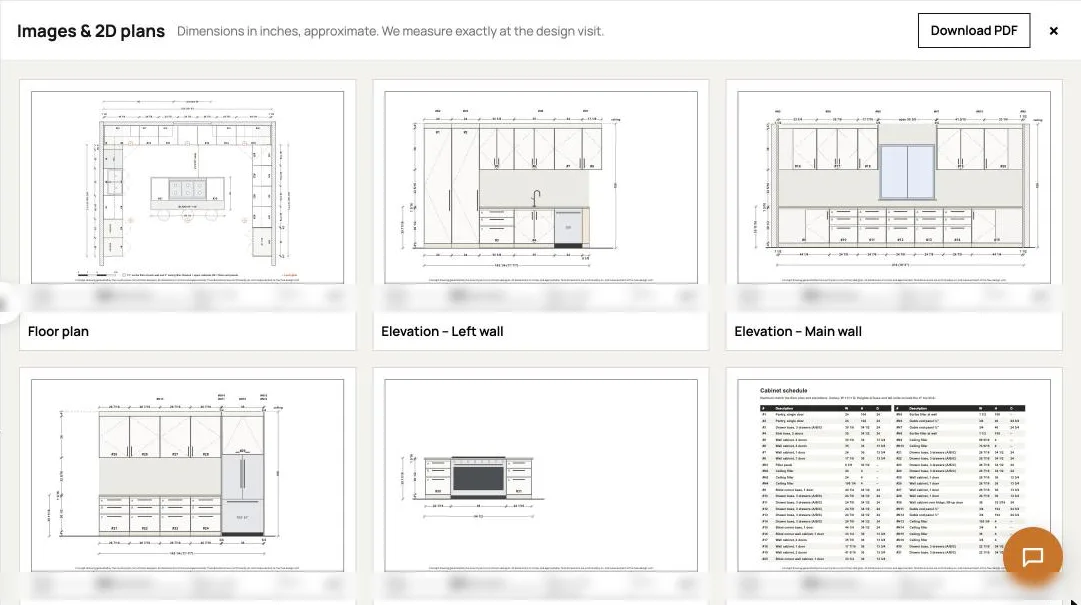
Dimensions in the plans are approximate. They are good for planning and comparing options; the final drawings come after we measure on site.
Step 11: Book a free design visit
When you like the design, press Book my free design visit. Your design comes with the request, so we start from what you made instead of from a blank page. At the visit we measure the room, check plumbing, electrical and venting, and turn the design into a detailed quote for the whole job: cabinetry, countertop, installation and the trades, done by our licensed trade partners.
Tips to design your kitchen in 3D
- Keep a clear counter between the sink and the cooktop. That stretch is where most of the prep happens.
- Put tall pantries and the fridge at the ends of a run, so they don't break up the counter.
- Try two or three colour schemes. Asking the AI is the fastest way: "white uppers, oak lowers", "all sage green", "black with brass".
- Check walkways around the island. Ask "how much space is around the island?" The kitchen planning guidelines from the National Kitchen & Bath Association are a good reference for clearances.
- Don't chase the last inch. The cabinet sizes are standard Modello sizes, and the exact fillers are worked out after the site measure.
Frequently asked questions
Is the 3D kitchen designer free?
Yes. Designing, the 3D view, the 2D plans and the PDF are free, and there is no obligation to book.
Does it work on a phone?
Yes. The questions, the 3D view and the AI box work on phones and tablets. Photos can be taken straight from the phone camera in step 1.
Are the cabinets real products?
Yes. The designer only uses Modello Cabinetry boxes, colours and handles, in the sizes Modello makes. What you design is what can be ordered.
How accurate is the price?
It is a range for the cabinetry in your design, based on the boxes and finishes you chose. The final price comes after the site measure, once the exact sizes, countertop and the rest of the renovation are known.
Can I design a bathroom vanity or a closet the same way?
Yes. The design studio has a bathroom vanity designer and a closet designer that work the same way: a few questions, then a 3D design with a price range.
Ready to try it? Open the 3D kitchen designer, or see our Modello Cabinetry kitchens first.